Home Assistant Part 1: Setup and Initial Configuration
I’ve had various ‘smart’ devices in the house for a while, but they’re all separate systems that don’t talk to each other. I looked into systems to get everything talking to each other and Home Assistant is the one I chose to go with!
This series of blog posts about Home Assistant will document and detail the setup I’m using, as well as linking to the devices, parts and equipment I’m using to make what I’m doing possible.
Equipment
These are the bits of hardware I used to get Home Assistant up and running:
- Raspberry Pi 4, 4GB it doesn’t need to be this powerful (it can run on 3+ or 2GB variants) - this is just what I had (because my Raspberry Pi’s are often bought at release due to the excitement of a new model, then sit in a drawer doing nothing)
- Raspberry Pi case note: I’ve ordered a new case that acts as a heatsink so I don’t have to use the fan and I’m going to experiment with using that instead as the Raspberry Pi 4 can run a little hotter than I’d like
- Raspberry Pi power supply - note the new Raspberry Pi 4’s need USB-C power supplies that can deliver 3amps
- Micro SD Card - Home Assistant recommends an A2 class card, I just grabbed one from my collection of many micro SD cards I had sat in a drawer, I don’t think it’s an A2 class card though
- Ethernet cable - I’ve got my Home Assistant wired into my network, so I haven’t been through the WiFi setup process.
Installation
I won’t post detailed instructions on the installation process as the Home Assistant documentation has got instructions on how to do it.
One thing I will note though - I found it difficult to work out what the name of the installation I was using was. There were so many terms in use that I wasn’t sure what I was using. Hassio? HomeOS? Home Assistant Core on Docker? It felt really confusing.
It turns out Home Assistant actually wrote a blog post detailing how even they think their documentation is all over the place. In that post they list the names of the methods that are officially supported now.
Based on that blog post the installation method I used was “Home Assistant”.
The tl;dr is:
- Download the image for Raspberry Pi 32 bit
- Flash it to a micro SD card
- Plug micro SD card in
- Connect Raspberry Pi to ethernet
- Boot up
- Wait
- Access http://homeassistant.local:8123
I then set a static IP address for the device in my router:

The device showed up as HOMEASSISTANT in my router control panel, so it was easy to find. YMMV.
Initial configuration
On accessing http://homeassistant.local:8123 for the first time I was presented with some integrations that Home Assistant had found on the network.
It had found:
- My Philips Hue Bridge
- Google Cast
- My Pi Hole
- My Tuya Smart Life devices
I used the UI to configure each one of these as required - what each one requires is detailed in the setup process and will vary depending on what you have on your network.
For my Philips Hue setup for example, it used the standard process of asking me to press the button on my bridge. Then it could be given access to control the devices for that bridge.
My first automation
I’ve used some WiFi outlets that are part of the Tuya platform for a while (though, I’m phasing these out for locally controlled Zigbee ouetlets, more details on that in an upcoming post)
They have automation in the app for a schedule to turn on and off, but because they’re a different app to my Philips Hue lights, I found myself wishing I had a way to manage them all in one place. That’s what led me down the path to Home Assistant.
So, I removed the automation I had in the Tuya Smart Life app, and went about setting it up in Home Assistant instead.
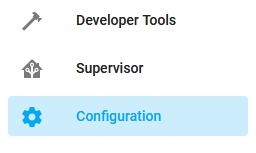
Access the automation control area by clicking “Configuration” in the sidebar:
Once there, click on “Automations” within the list displayed:

Click the little “Plus” (+) icon in the corner to add a new automation, which brings up this little modal with a wizard which will try and help you with what you want to do:
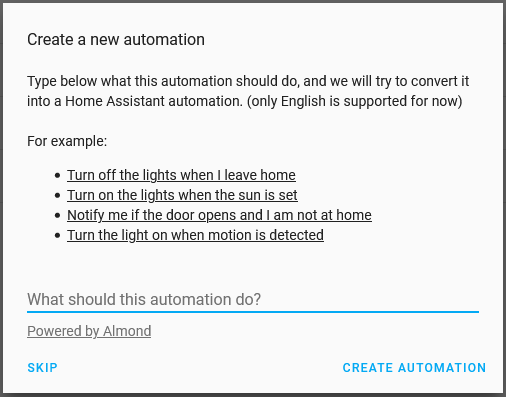
Note: On setting up an automation for the first time, I didn’t notice the “Skip” option and thought I had to fill it out. On clicking “Create automation” after filling the form out, it tried to work out what I’m trying to achieve and set some stuff up for me. But it wasn’t right, so I tried again, and noticed the skip option which took me straight to the create automation page.
Under the surface, Home Assistant uses lots of YAML files as config. In these newer releases of Home Assistant the user interface allows you to configure things using forms etc, but ultimately, it’s just changing YAML config behind the scenes as I’ll show you as we configure this automation.
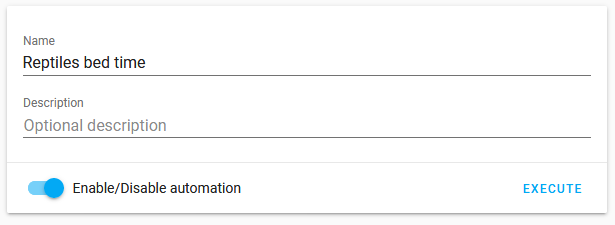
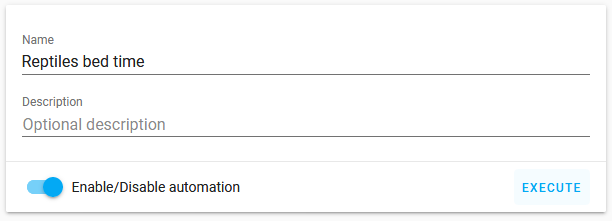
Give the automation a name, we’ll call this one “Reptiles bed time”.
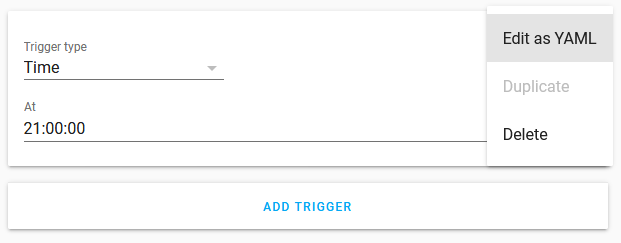
Now we need to specify a “trigger” for the automation. The trigger is the thing that will cause the automation to run.
You can have many triggers, which I’ll cover some of in a future post, but for this one we’ll use the “Time” trigger.
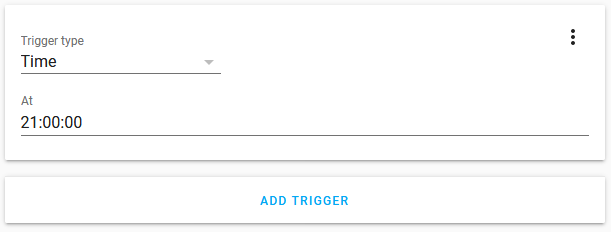
Set the value to 21:00:00 so it runs at 9pm every night.
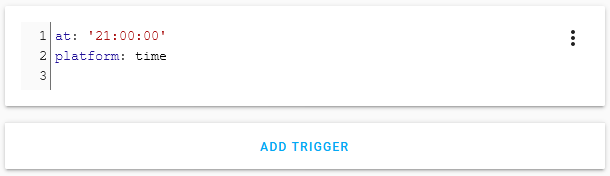
If you want to access the YAML that’s in use under the surface, click the three little dots top right of the trigger box and select “Edit as YAML”.
You’ll then see the YAML that’s been generated to power this trigger. You can even edit this if you want (if you know what keys & values you need to use)
Now we have a trigger for the action, we need to specify one or more actions to run.
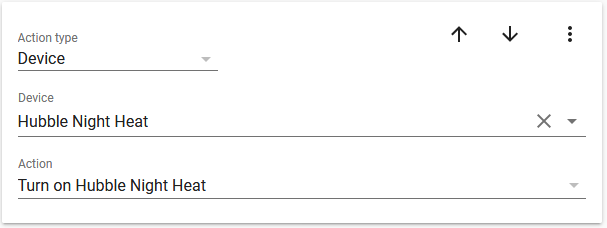
For this automation, we’ll turn some reptile lights off, and others on. For example: Mr Hubble has a bulb for the day time, and a different bulb for night time. These bulbs aren’t smart bulbs as they’re designed to give the correct amount of light, heat and UV etc. But the outlets they’re connected to are Tuya Smart Life plugs that I can turn on and off.
We’ll use an action type of “Device” and specify the device we want to use, and the action we want to take on that device.
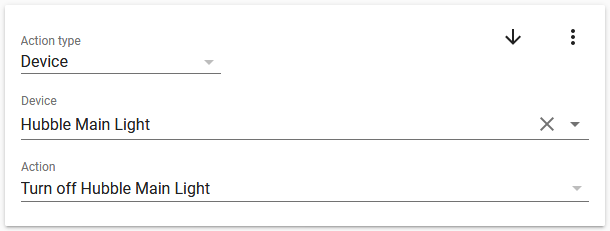
This now means that the light “Hubble Main Light” will turn off at 9pm. We need the night light to turn on as well.
Now we have our devices doing what we need in this automation, click the save icon in the bottom right.
We need to test that the actions are doing the right things, we could wait until 9pm for it to activate, but who has time for that?
Thankfully, we can execute an automation whenever we want by scrolling to the top, and clicking “Execute” under where we entered the name of the automation:
The automation should run, and (in this case) the lights should turn off and on as specified!
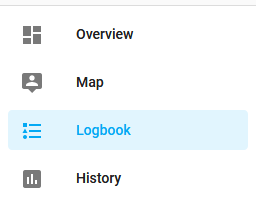
We can check this in by clicking on the “Logbook” in the sidebar:
Then looking in the list and seeing that the automation was run, and the switch states changed!
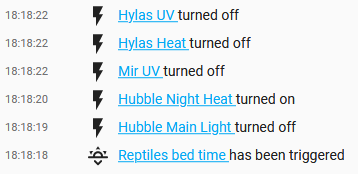
Success!
If we want to test the trigger, we could change it to be a time just ahead of the time you’re doing it, and seeing if it runs once you save it. I’m not aware of another way to test this yet!
Conclusion
My initial setup of Home Assistant was painless, I didn’t encounter any issues (that I can recall) when I first did it, which was nice.
Just plugging in a micro SD card and having it set itself up to the point that it can be accessed and configured in a browser felt really slick. Good job, Home Assistant team!
Future posts
Future posts in this series that I’ve already got planned will include:
- The mobile app and control away from WiFi
- Notifications
- Dashboards
- Add-ons
- Adding a 3rd-party Zigbee gateway and zigbee devices
- Sensors, dashboard-monitoring of historical data
I’ll update the series as I add more things, but who knows what the future holds!